Saturday, October 15, 2016

A long-sleeved silk gown

I know that I'm late on the quarter backed italian gown train... In my defense, these sleeves are a menace to set and once Prelude to Victory was cancelled I lost all desire to work on them.  Here's my adaptation of a 1780's long-sleeved gown, at long last.
I used my chintz jacket as a template for this gown.  It's four pieces connected with Abby's patented gown stitch, with 'butterfly' sleeves (each sleeve is one piece, but it opens up into a Y at the elbow to accommodate the change in angle.)  I didn't trim it yet, although I plan to get some gauze onto it once I have the chance to.  I sort of like it plain too, though, and I can bring it up into the 1790s with various accessories if I want to.
This gown is a walking Vogue fabrics commercial!  The gown and petticoat silk are both from the home dec section.  The muslin millinery is courtesy of B&T and the facing is scrap silk from my stash.
Thanks for the pictures, Rebecca!!!!
 The front still needs to be taken in.  If I could have helped it I would have set the sleeves about 5 degrees more forward so that the bodice wouldn't be so wrinkled at the underarm, and I would have made the skirts longer - but I can just polonaise them up if I'm deeply unhappy about that.
Today's lesson: measure twice, cut once, piece it if you did it wrong!


Wednesday, July 20, 2016

Buff Stuff - Half-boned Stays

It's been such a busy summer so far for me!  Living in the 1830s for 9 hours a day, with all the physical labor involved, is a pretty exhausting proposition.  But I'm learning so much and I'm getting to put my pre-existing skills and knowledge to good use, too (and probably gaining a lot of cheese weight...ugh.)

But I have made some sewing progress!  First and foremost, I needed to make a new pair of stays before the year started, because my red wool ones are trashed - I made them before I had a good grasp of, well, anything.  So I've been working incrementally on making up a new pair that fits me better.  I did a half-boned pair this time, since I really don't need the amount of support that full boned would give, considering the work that I do most often!  It was a little scary, since full-boned means that all you have to do is follow the line of the last row of stitches that you did, as opposed to making non-parallel lines like I did here.  But, in my opinion, my first try wasn't too bad.  Nicole's tutorial on leather binding helped immensely.

The pattern, and really the whole piece except for the stitching and materials, was engineered by Abby.  I'm so grateful!  They fit me better than any commercial pattern could have.  They get my waist to where I want it to be comfortably, but don't dig into my waist (25", baby!) and the lacing down the front allows me to adjust the bust thrust as needed.  I did have to take it in a good deal to get the amount of constriction I like, but that was all ironed out during the fitting process.  The back gap is pretty small and I'm concerned that it'll get smaller as the fabric stretches, and  need to bring the chest points in a little further.  I also need to put on straps and tack a piece on to the center to keep the bottom straight, but that'll be simple.

The fabric is beige wool stuff from B&T, lined in 2 layers of linen osnaberg, boned with zip ties and bound with Larkin & Smith's kid leather.  Hand done, as usual, with cotton and linen thread.  Laced up in this case with shitty rayon ribbon.

And the pictures are terrible because they're from my ancient phone.  No room in the car for my big, clunky camera, apparently...


After spending a week or two indulging in the dulce far niente of binging Grey's Anatomy, I need to make a new shift or two.  The situation (or shift-uation, hah!) is getting a little ridiculous.

Monday, May 16, 2016

Actual pictures, wouldn't you know!

Anyways, I'm happy to be home.  I didn't get around to making a late 60's beach outfit or bathing dress like I'd dreamed about last summer, but that's because in a week, I'm going to Massachusetts for an interpretative internship!  I'm really excited.  But the lake is beautiful at this time of year, so I pulled out my 1840s jacquard that never got a good photo shoot.  I rediscovered my love of photoediting, which hopefully explains the gratuitous filters.
I would ideally have a nice 1840's bonnet to go, but I don't have an event to go to that would necessitate making one.  I'm accessorizing with anachronistic pieces; a late 60s tilting parasol and lace shawl.  But I wanted to show them off!
Hey, that's a nice ol' lake over there, ain't it


As I wrote in my official post for this dress, it's a silk jacquard I got from my summer job, lined in cotton, done in a mid-late 1840s style.  Amazingly it still fits perfectly after a year, although it could have benefitted from an ironing (and the hem front still needs to be taken up! egads!)


If y'all want to use one of these for a gothic romance novel, at least ask me first.
I hope you all have a great summer!  I have some choice projects to share with you and I look forward to seeing what you all have put your hands to.

Tuesday, May 3, 2016

Thoroughly Modern Millinery - 1820s

My second year is coming to a close, and I had the opportunity to take a (21st century) millinery class a school, for which I've made several hats in a variety of new ways.  We had to wear one of them for our final assignment, a class tea.  I decided that this would be the perfect opportunity to make the kind of hat that I've always dreamed about - the comically big late 20's early 30s pieces.  I absolutely adore them.  They're weirdly avant-garde and modern in some of their shaping, they're unapologetically fun, but they have a defined equation for construction.  I thought that it would be a fun challenge.

And of course, if I make the hat I also have to make the dress for the final.  So I made that, as well.  The dress ended up being more effort than the hat (not by much, given that I decided halfway through that yes, I did have to bind the brim edge, not just hem it).  I've always loved the sheer 1820s-30s dresses with the delicate whitework and gathering, so I took inspiration from a few original garments and paintings.  The underdress is plain, unlined white cotton (I was debating - all the references I could find were silk, but I found several original garments made from cotton; cotton was cheaper ad more available, so I went with that.)  The gown itself is unlined cotton voile with cotton whitework.  I used my basic 1830's pattern, slashed and spread it to allow for shirring and whipped the seams to the whitework.  Time consuming but straightforward.
 

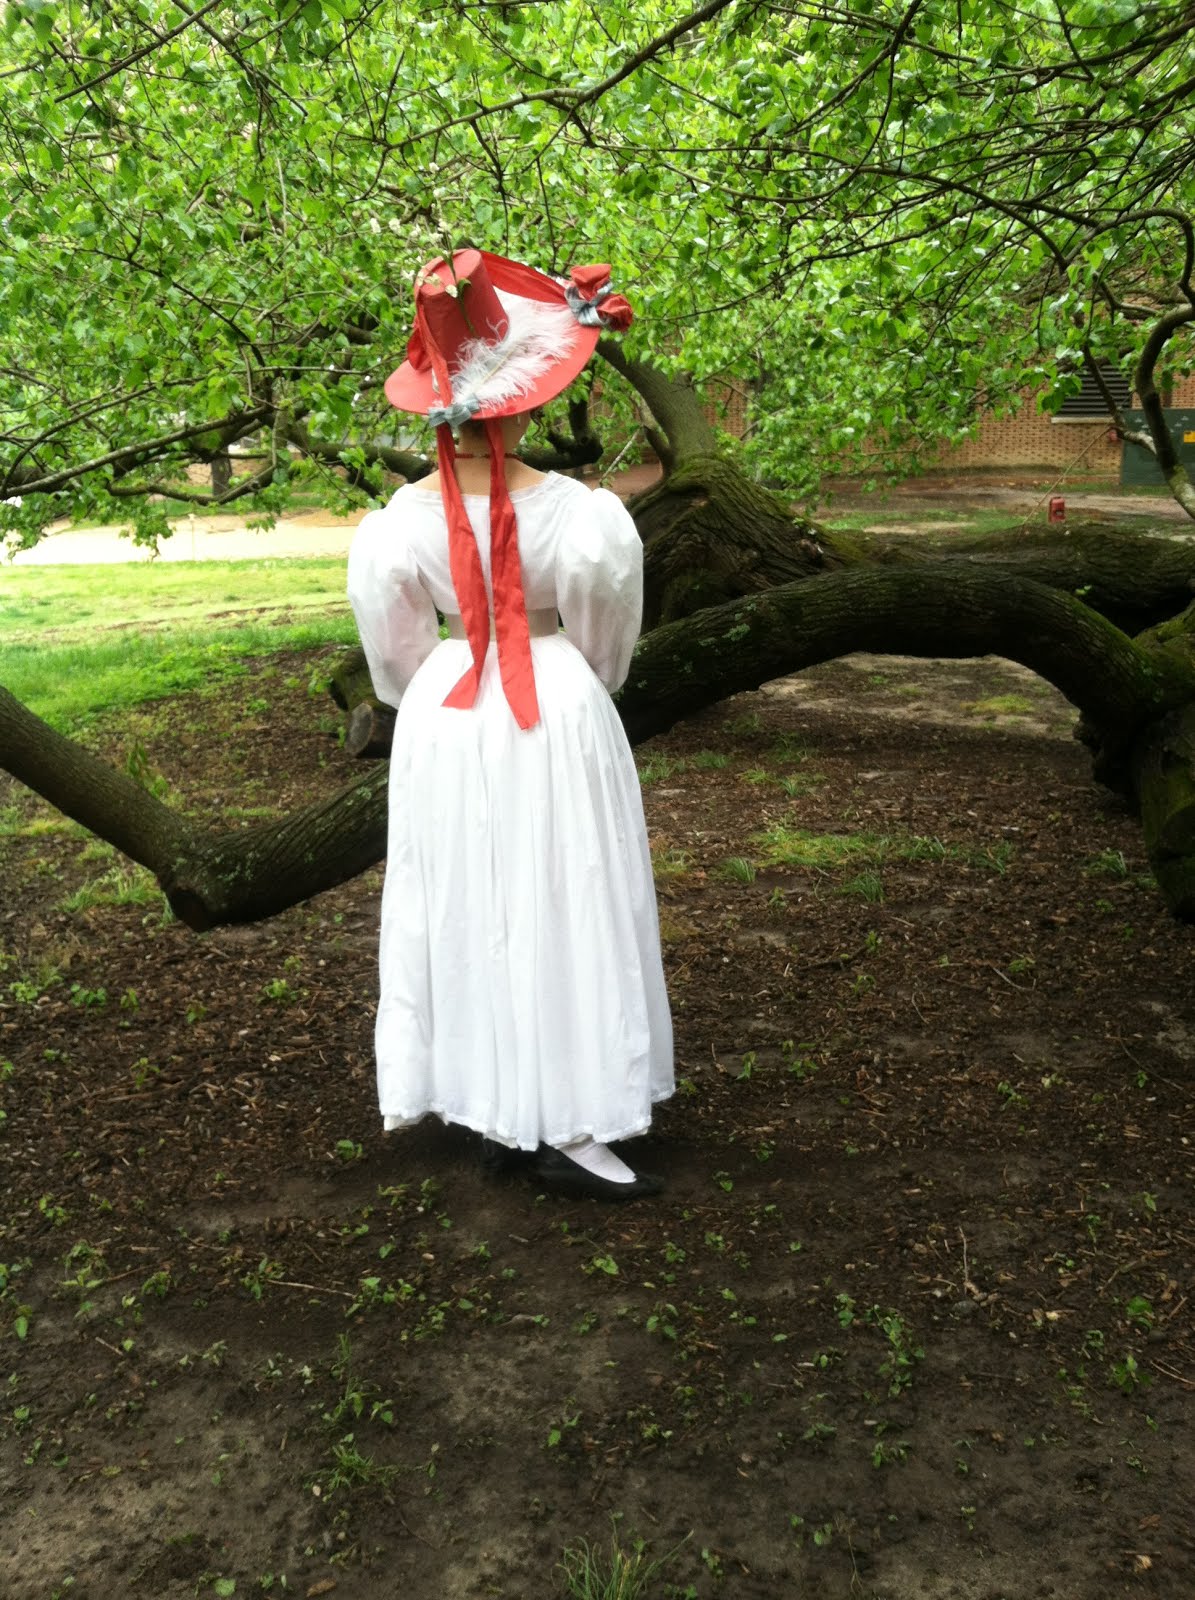
Anyways, here's the actual hat itself.
Unfortunately, the humidity killed my nice, tight curls... But, you know, it was a look, so to speak.
The hat turned out fine, although I'm wearing it a bit far back courtesy of my subpar hair dressing skills.  In all the fashion plates that I looked at the ties fell behind the hat instead of being used as actual ties (and when I did use them as ties, it tilted the hat far too far back anyway.)  I used the same silk that I used for my petticoat, lined it with white silk (I couldn't find any references to a colored hat being lined with white silk, only white with white and colored with colored, but I ran out of pink silk.)  I hemmed the remaining silk for ribbons, some of which I wired.  I ordered some cheaper rayon ribbon as accents and found a big old feather plume at Michael's for a finishing touch.  I love the finished product, although there are things I'll remember to do differently next time.
The neckline of the gown's a little weird, since I intended it to be more of a boatneck style then it ended up being, but that's easily fixed.  The one thing I would change is that I wish I could put another panel into the skirt - it's a little sad looking, but the sleeves ate up so much fabric that I didn't have any left (not that I mind.  I love the sleeves and will defend my artistic choice to the end.)  A simple single faced silk satin ribbon from District 99 fabrics (thanks, Fort Fred!) finished off the look.  I would have loved to have gotten my hands on a belt buckle, but there were none to be had.

This is probably my favorite piece I've ever made.  It looks pretty much near perfect, constructed with proper technique and materials, and it's very understated and simple.  I'm really happy with it!
I'll post my other hats when I get the time.
Photo credit - the inveterate Stacy!!!!!!

Sunday, March 6, 2016

Lots of silk!!!

I finally got another presentation-worthy garment finished for the yearly ball!  I started this plain gown at the Burnley and Trowbridge workshop last fall, using some 36" wide white silk taffeta that I had in the stash.  I wish that I'd used thicker fabric in retrospect, but I think that this gown will be nice and versatile anyways.

I should have worn a tucker (and sleeve ruffles), but I spent so much time with the neck trim that I didn't have the energy.  I'll definitely have to make sure I add one next time I wear it, though...... Yikes...
Anyways, I wore it with a matching silk petticoat and breast knot made from fabric that I got on vacation to Paris, which made it really quite special.  The color is my favorite thing about the outfit.  I tried to put my hair up properly with Heirloom Hair Care's powder and pomade, but mine is so thin and fine that I gave up, put it over a long pillow and slapped one of my dirty old caps on it.  I was super bummed that I didn't get to use my big ostrich plumes.
Check out that bum!!!!!
Yeah!  Need a tucker ASAP.
Anyways, next time:  wear a shift with less bunchy sleeves (and preferably re-set the sleeves themselves), redo the shoulder straps to put the neckline at more of a right angle, add all the necessary ruffles.  I'm super jazzed about this gown! Thanks to the ladies of the millinery shop, Donna and Burnley and Trowbridge for the workshop.

Next up on the docket: going back to my sartorial roots: big hats and the glorious 1830s.